Crispy and tender chicken is first marinated with ginger, garlic, soy sauce and fresh lemon. It is breaded with sesame seeds and panko bread crumbs and then lightly fried. The easy and tasty marinade also doubles as the dressing for the spinach salad.
Chef's notes
Panko bread crumbs are Japanese bread crumbs. They add to wonderful crunch and crispiness to many fried foods.
Steps
1
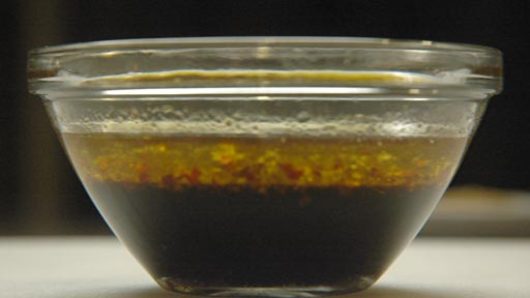
Making the Vinaigrette
Ingredients
1" -inch piece fresh ginger
1 clove garlic
1/4 cup soy sauce
juice of 1/2 a lemon
1 tbsp rice wine vinegar
1 tsp chili flakes
1/3 cup grapeseed or extra-virgin olive oil
1 tsp sugar
To start, finely mince the ginger and garlic and add to a bowl. Next, add the soy sauce, lemon juice, rice wine vinegar, sugar and chili flakes and then whisk in the oil. Set aside, while you prepare the chicken.
This can be done a day or two ahead of time and stored in the refrigerator.
2
Preparing the Chicken
Ingredients
4 boneless, skinless chicken breasts
To prepare the chicken, slice it through the middle lengthwise. To do this, hold your knife horizontally to the cutting board and slice through the middle of the breast. Basically, you want 8 long, thin fillets.
Next, spoon a few tablespoons of the vinaigrette over the chicken and toss to coat. Let marinate for at least 30 minutes or even overnight in the refrigerator.
3
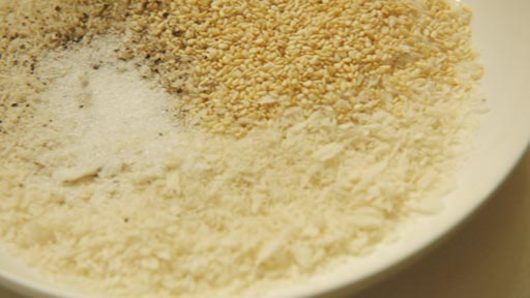
Seasoning the Crumbs
Ingredients
1 cup panko bread crumbs
1/4 cup sesame seeds
1/2 tsp kosher salt
1/4 tsp freshly ground black pepper
Combine the panko and sesame seeds and season with salt and pepper to taste.
4
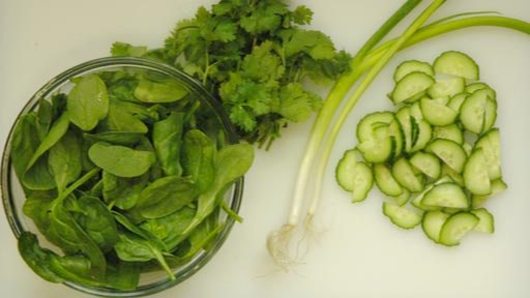
Preparing the Salad
Ingredients
4 cups spinach leaves (preferably baby)
1/2 bunch fresh cilantro
1/2 bunch fresh mint
1/2 English cucumber, unpeeled
2 green onions
For the spinach, cilantro and mint make sure it has been cleaned and spun dry.
Remove the leaves from the cilantro and mint and give them a rough chop.
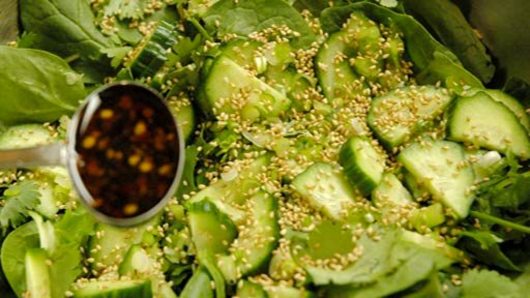
Next, slice the cucumber down the middle, lengthwise, and then slice into thin slices. For the green onions, slice the bulb end down the middle and then thinly slice. Place everything in a large bowl and set aside while you cook the chicken.
5
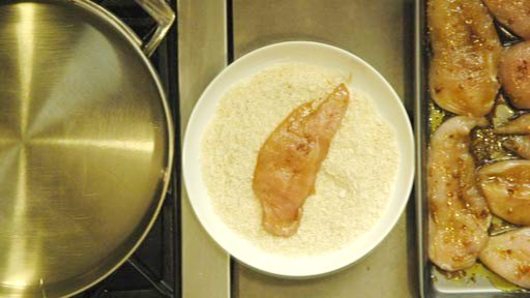
Shallow Frying the Chicken
Ingredients
3 to 5 tbsp grapeseed or canola oil
1 to 2 large eggs
1/2 cup all-purpose flour
canola or other frying oil
To start, gather 3 shallow bowls/containers. Place the flour, beaten eggs and seasoned crumbs into each bowl. Set up a cooling rack over a baking tray. Set aside.
Next, gently pat the chicken dry and dredge with flour. Coat with the beaten eggs and let the excess drip off before coating with the seasoned crumbs. As you bread each piece of chicken, place it onto the cooling rack to allow it to dry/set for about 10 minutes or so.
While the chicken is drying, place about 1/4" to 1/2" -inch of oil in a large heavy-bottomed fry pan and heat over medium heat. Once the oil is hot, add the breaded chicken pieces. Shallow fry the chicken on each side until golden brown and cooked through. You may need to cook the chicken in batches.
Once the chicken is done, remove it from the pan and place onto a clean cooling rack (with a tray underneath) to allow the excess oil to drip off. Once of all of the chicken is cooked, set it aside while you assemble the salad.
6
Dressing the Salad
Ingredients
1 tbsp toasted sesame seeds (optional)
Add a few tablespoons of the vinaigrette (and the sesame seeds, if using) to the salad and gently toss to coat. Taste for seasoning, adding more vinaigrette and/or seasoning as needed.
7
Assembling the Plate
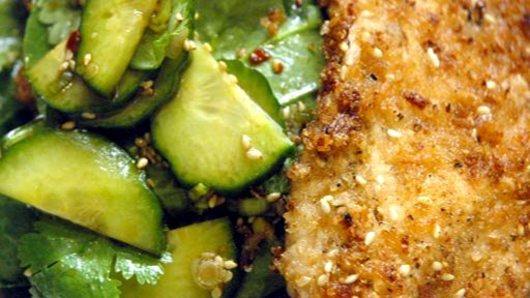
Place a handful of the salad onto a large plate. Top with a piece of chicken. Then add another bit of salad, followed by another piece of chicken.
Serve immediately and enjoy!